 Hash Commander
 physical screen
How to install the LilyGO T-Display-S3 to see your machines in 3D, next to them. 5 steps, about 2 minutes, all from the dashboard.
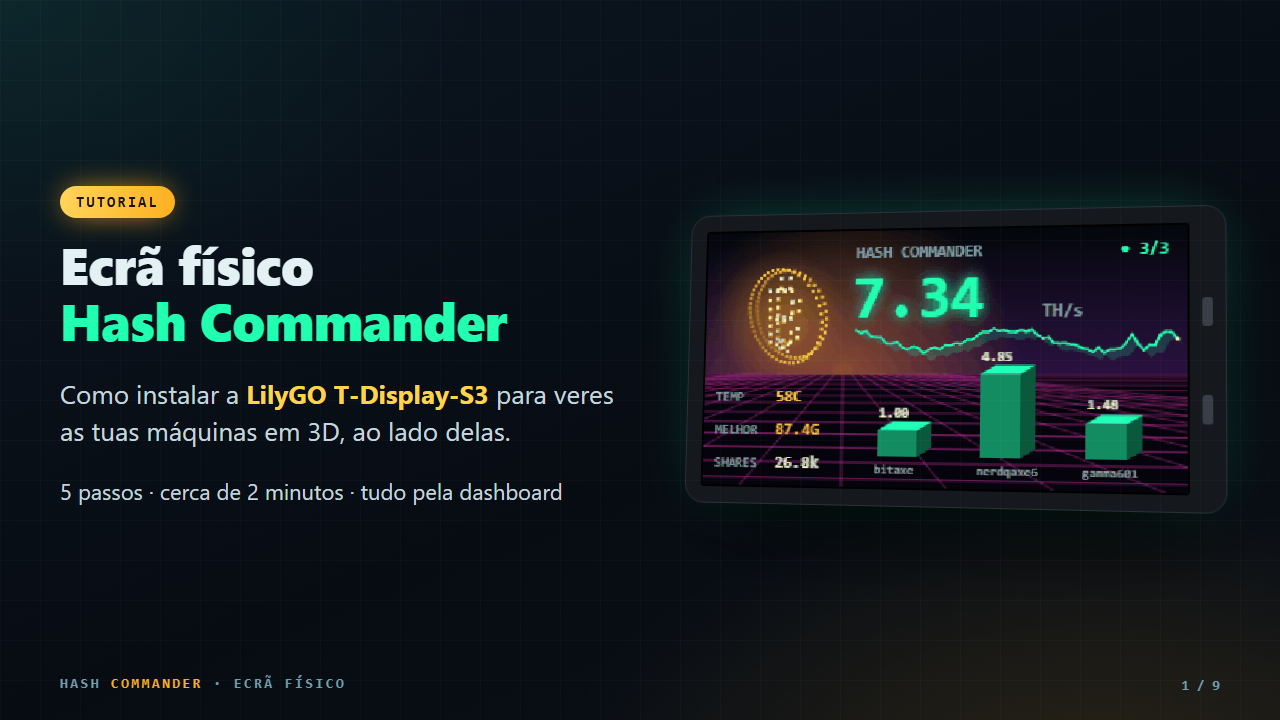
What you need
- ✓A LilyGO T-Display-S3 (the screen with an ESP32-S3 and 2 buttons).
- ✓A USB-C data cable. Some cables only charge and do not carry data: if the PC does not find the screen, swap the cable.
- ✓Hash Commander up to date, open on this PC and signed in.
- ✓The name and password of your 2.4 GHz Wi-Fi network (the ESP32 does not connect to 5 GHz-only networks).
Step by step
Connect the LilyGO to the PC
Use the USB-C data cable. The screen lights up; it may show "Install from the dashboard (USB)".
Tip: plug it straight into the PC (avoid USB hubs). Windows recognises it by itself, with nothing to install.
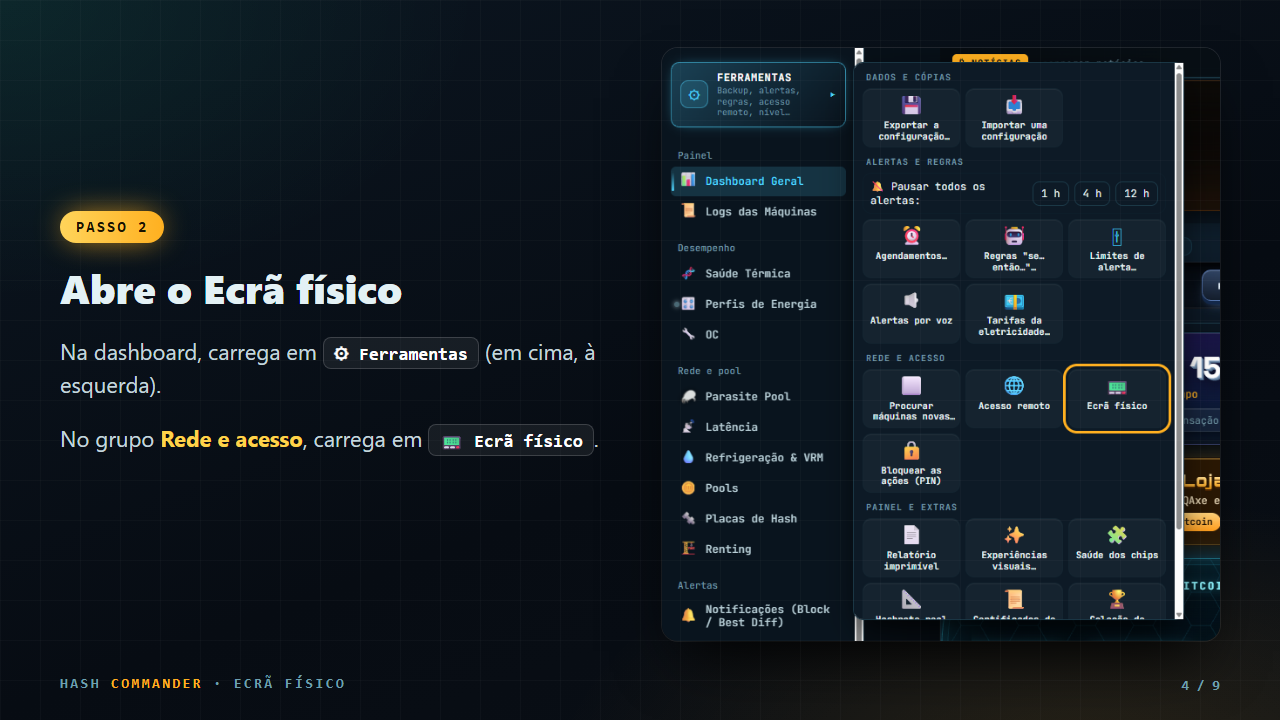
Open the Physical screen
In the dashboard, click Tools (top left). In the Network and access group, click Physical screen.
Wi-Fi and Install
- ✓USB port: "✓ ESP32 found" should appear. If it does not, click Scan.
- ✓Type the network name and the password (2.4 GHz).
- ✓Leave "Flash the program" ticked and click Install.
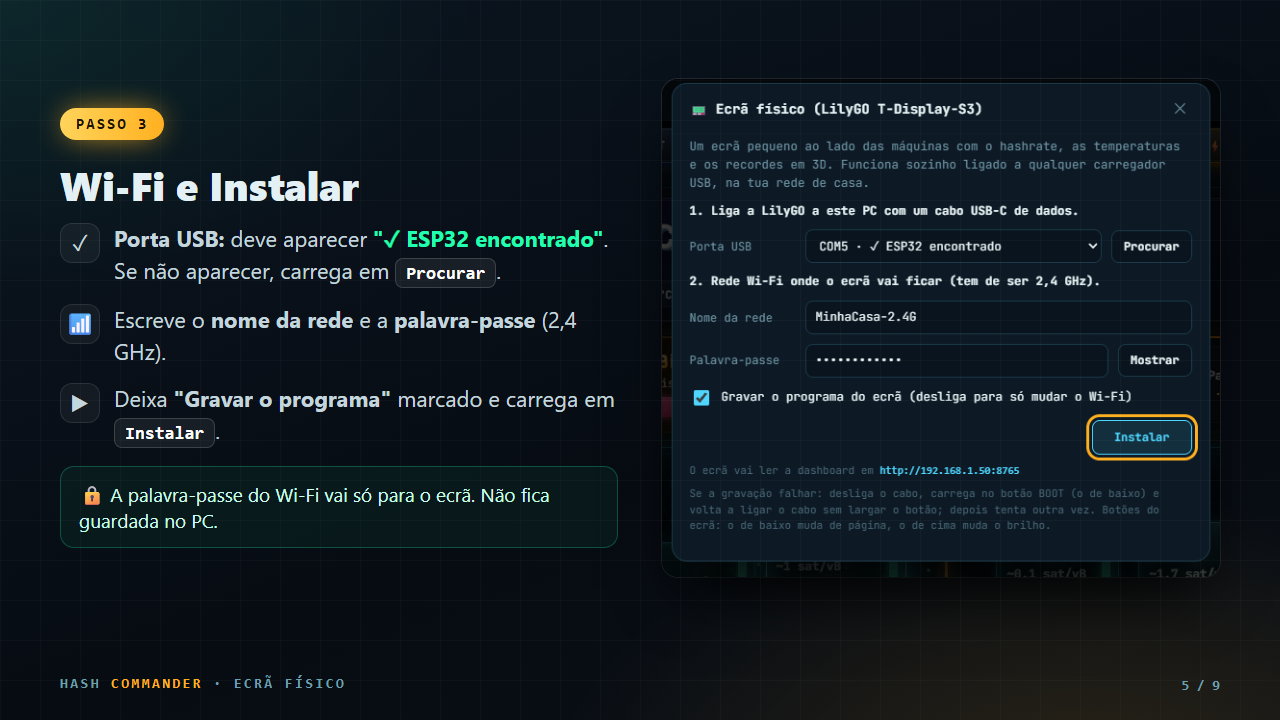
The Wi-Fi password goes only to the screen. It is not stored on the PC.
Wait for the flashing
The bar shows "Flashing the program to the screen… %" and then "Sending the Wi-Fi". It takes about 1 minute. The screen flickers and restarts by itself.
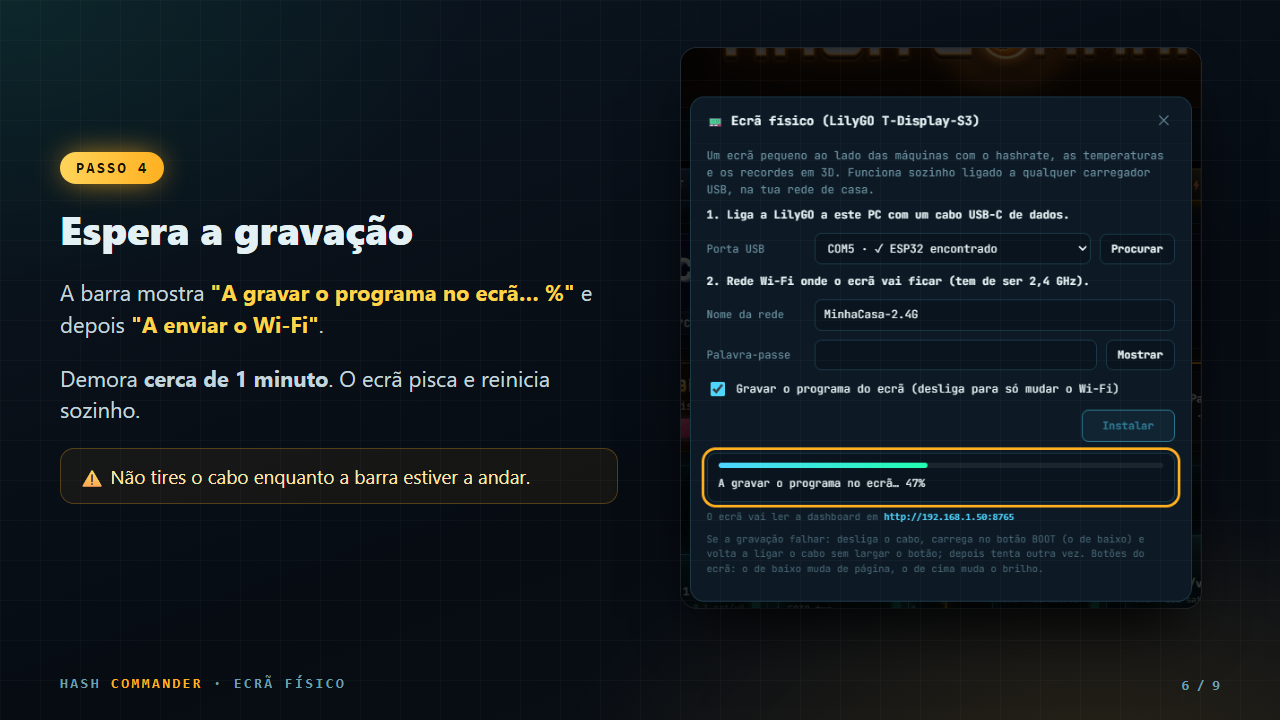
Do not unplug the cable while the bar is moving.
Done!
"✓ Done" appears. Now you can unplug the cable from the PC and plug the screen into any USB charger, near the machines.
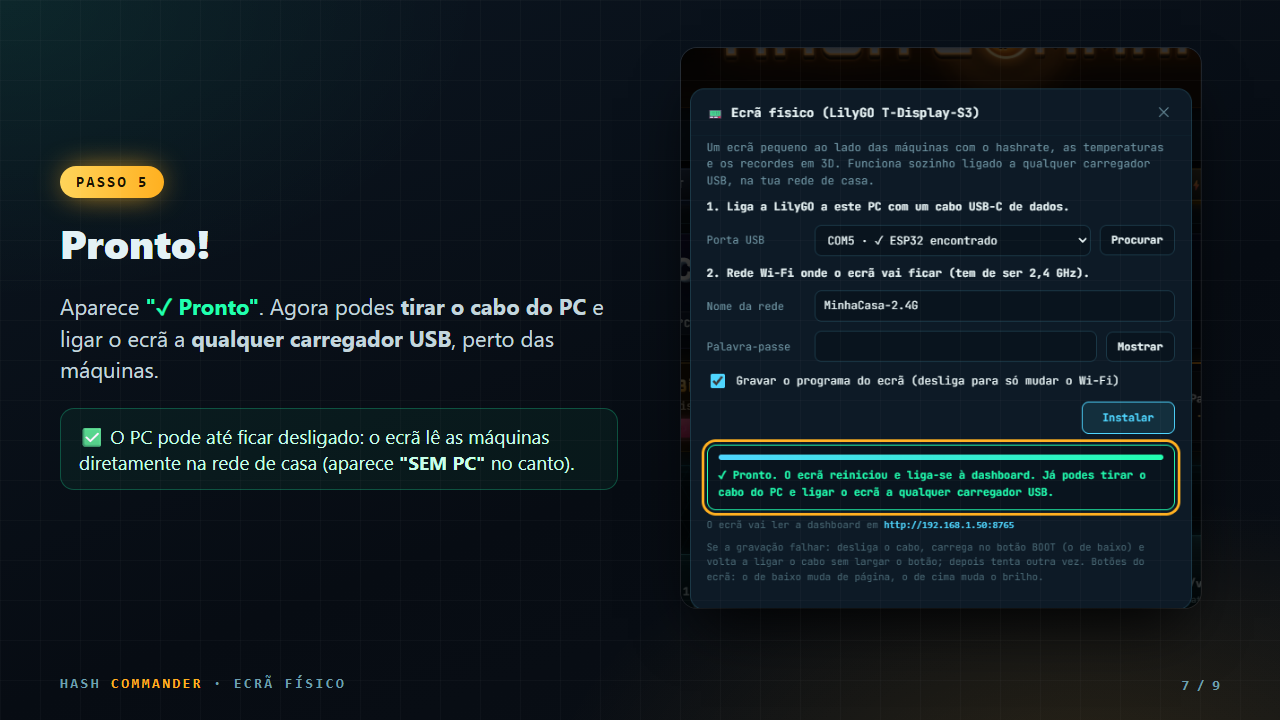
The PC can even be off: the screen reads the machines directly on your home network ("NO PC" appears in the corner).
Buttons and pages
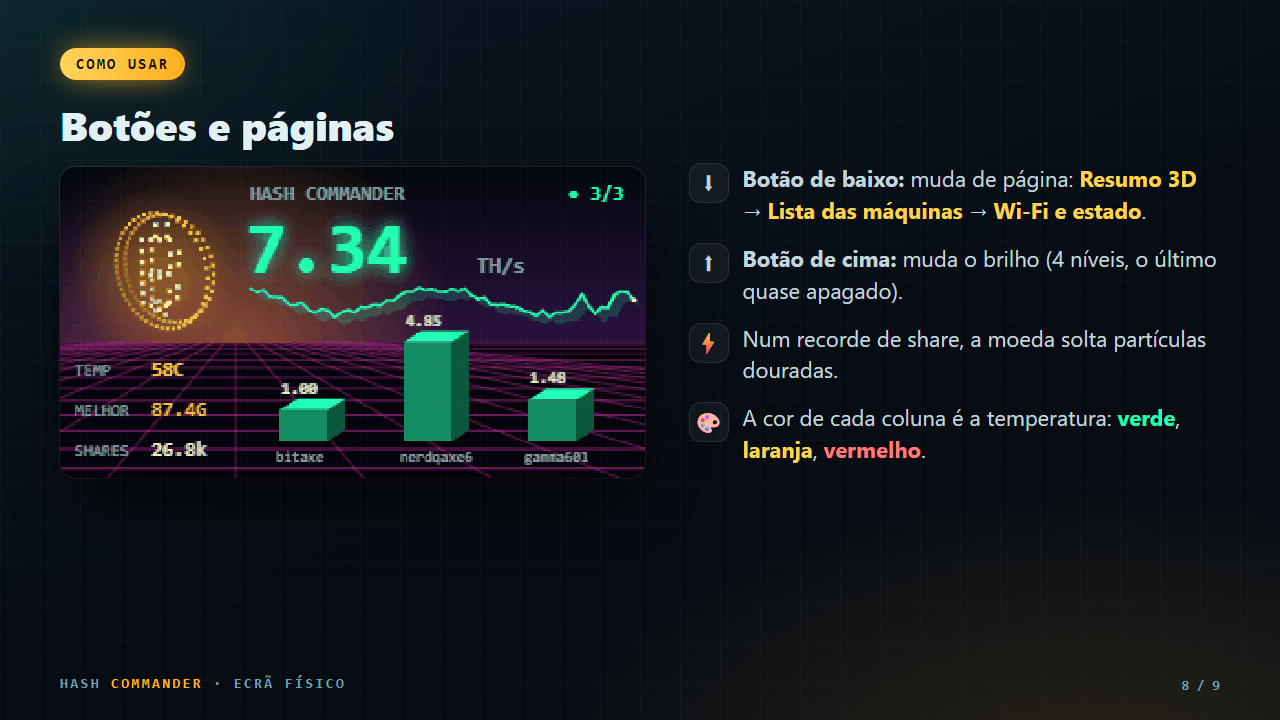
- ↓Bottom button: changes page: 3D summary → Machine list → Wi-Fi and status.
- ↑Top button: changes the brightness (4 levels, the last one almost off).
- ⚡On a share record, the coin releases golden particles.
- ●The colour of each column is the temperature: green, orange, red.
Problems and solutions
The USB port does not appear
Swap the cable (it must be a data cable), plug it straight into the PC and click Scan.
Flashing fails
Unplug the cable, hold the bottom button (BOOT), plug the cable back in without letting go and click Install again.
It stays on "Connecting to Wi-Fi…"
Check the password and that the network is 2.4 GHz. Repeat the installation with "Flash the program" unticked (this only changes the Wi-Fi).
"Machines not responding"
The screen and the machines must be on the same home network. Open the dashboard once to refresh the machine list.